How to Use GitHub Copilot in VS Code: A Complete Guide
Hey everyone, welcome! In this article, we’ll explore how to use GitHub Copilot in vs code ( Visual Studio Code ) to accelerate your coding process.
What is GitHub Copilot?
GitHub Copilot is an AI-powered coding assistant that helps you write code faster by suggesting lines, functions, and entire blocks of code based on your comments and inputs.
Powered by GPT-3, it can generate multiple code solutions for a task, giving you the flexibility to choose the best one.
For example, you can simply write a comment describing a task like “generate a random number” or “sort an array,” and Copilot will handle the rest!
Read Also: What Are Copilot Pages? Feature, Pro & Cons [2024]
In this guide, we will cover:
Installing GitHub Copilot in VS Code.
Using it to generate JavaScript, React, and HTML code.
Step 1: Installing GitHub Copilot in VS Code
Go to your GitHub account settings.
On the left menu, select GitHub Copilot and enable it.
Save your changes.
Now, open VS Code:
Go to the Extensions tab and search for “GitHub Copilot.”
Install the extension and restart VS Code.
Once installed, you should see the Copilot icon at the bottom of your screen.
Note: Currently, GitHub Copilot offers a free trial for two months, ending on August 22nd. Afterward, it costs $10/month or $100/year.
Step 2: Generating JavaScript Code with GitHub Copilot
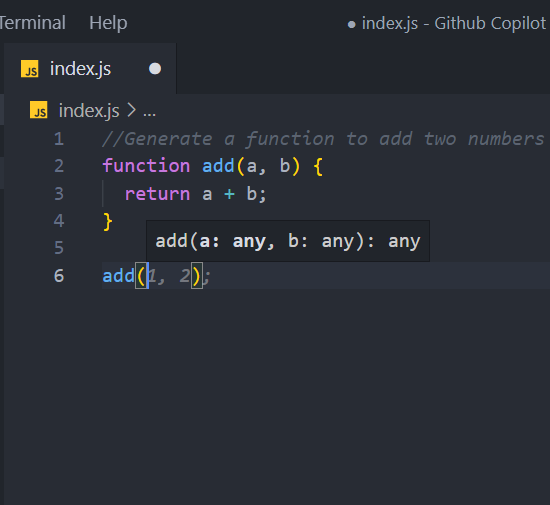
Let’s start simple—generating a function to add two numbers:
Open a JavaScript file in VS Code.
Type the comment
// Generate a function to add two numbersand press Enter.Copilot will suggest code for the function.
Example output:
function add(a, b) {
  return a + b;
}
You can accept the suggestions by pressing Tab. Now, let’s call this function:
add(2, 3);
Step 3: Generate an Array of Rainbow Colors
You can also use Copilot to create an array of colors:
Write a comment
// Generate an array of all the colors from the rainbow.Press Enter to see Copilot’s suggestions.
Example output:
var colors = ['red', 'orange', 'yellow', 'green', 'blue', 'indigo', 'violet'];
Step 4: Creating Arrays and Merging Them into an Object
Let’s create arrays of numbers, strings, and booleans, then merge them into an object:
// Create an array of numbers
var numbers = [1, 2, 3, 4, 5, 6, 7, 8, 9, 10];

// Create an array of strings
var strings = ["hello", "world", "how", "are", "you"];

// Create an array of booleans
var booleans = [true, false, true, false, true];

// Merge them into an object
var objects = [
  { number: 1, string: "hello", boolean: true },
  { number: 2, string: "world", boolean: false },
  // Copilot will suggest the rest...
];
Step 5: Using GitHub Copilot with React and Express
For React, let’s import some modules:
Write a comment
// Import useState hook from React.Press Enter, and Copilot will generate:
import React, { useState } from 'react';
Similarly, you can import multiple hooks:
import React, { useState, useEffect } from 'react';
For Express, import a package:
// Import CORS from express
const cors = require('cors');
Step 6: Generating HTML Code with GitHub Copilot
Need to quickly create HTML elements? Let’s create an unordered list with items:
Type the comment
// Create a ul tag with list items Nishant, 25, and Patna.Press Enter to generate the following:
<ul>
  <li>Nishant</li>
  <li>25</li>
  <li>Patna</li>
</ul>
You can even style the list by adding a class and modifying the list style:
<ul class="lists" style="list-style: none">
  <li>Nishant</li>
  <li>25</li>
  <li>Patna</li>
</ul>
Final Words
In this guide, we covered how to install and use GitHub Copilot in VS Code for various programming tasks in JavaScript, React, and HTML. By harnessing the power of AI, you can significantly speed up your development process.
Whether you’re writing simple functions or complex arrays, Copilot is a great companion to help you code more efficiently.
Now, it’s your turn to explore and create with GitHub Copilot!


